Regular upkeep can safeguard your garments from harm, conserve power usage, and above all else, stop a blaze.
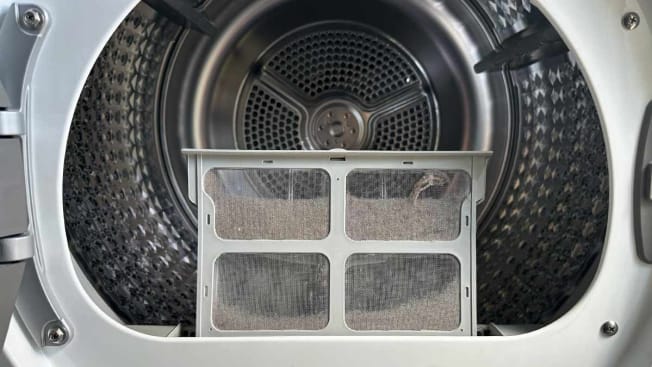
Clearing out the lint trap following every cycle is a method to prevent blockage within your dryer exhaust duct.
By Keith Flamer
Consider this a spring cleaning a wake-up call: Neglecting routine maintenance for your dryer could result in wasted time, financial loss, damaged clothing, and potentially losing your home if you're not careful. An ignored dryer significantly increases the risk of a fire—specifically, from 2019 through 2021, the Consumer Product Safety Commission reported that over 16,000 house fires occurred due to dryers, causing 10 fatalities and $239.7 million worth of structural damage. The primary reason behind these incidents was inadequate cleaning of the dryer.
Neglecting dryer maintenance can result in numerous issues as well. This can make automated cycles less precise, leading to clothing that remains wet or over-dried. Additionally, it might cause garments to shrink, damage fabric from excessive heat, and increase drying durations. In severe cases, it could render the dryer non-functional, leaving you with a large batch of moist clothes. Got your attention now?
Maintaining your dryer regularly can prolong both its lifespan and that of your clothing. Additionally, it ensures optimal performance. As Rich Handel, an expert from Consumer Reports specializing in laundry appliances, advises: "Ensure your dryer operates efficiently by performing this cleaning routine at least once per season—spring, summer, fall, and winter." He further notes, "This means doing so at least four times annually. For households with larger families, more frequent cleanings might be necessary."
However, what exactly does a dryer cleaning routine entail? Follow these straightforward steps to achieve optimal performance, efficiency, and safety from your clothing dryer.
Step 1: Clear Out the Lint Filter
After each load, once it’s dried—always do this. Allowing excess lint to accumulate on the filter impedes the flow of heated air through the dryer, which can lengthen drying times.
Step 2: Clear Out the Dryer Vent
Despite regularly clearing the lint screen, tiny threads often slip past the filter and end up in your dryer vent. If left unattended, these fibers can accumulate over time, potentially causing a dangerous fire within the ventilation system due to sparks. Therefore, it's essential to maintain cleanliness in the dryer vent every few months based on how frequently you use it and what types of clothing you typically dry. For instance, drying woolen garments or heavy towels tends to exert greater stress on your machine compared to lighter fabrics like cotton.
This job should be straightforward provided you can reach the dryer vent by sliding the appliance out from the wall; otherwise, consider hiring an expert. Make sure to unplug the dryer first for safety reasons. Afterward, detach the vent from the dryer unit and clean each end thoroughly with the crevice tool on your vacuum cleaner.
Remember to clean the rear section of your dryer as well, since this area tends to accumulate lint. Check that the ventilation duct remains undamaged, uncrushed, and unrestricted. It’s advisable for you or a specialist to thoroughly clear out the entire duct system extending from the dryer to its outdoor exit point. Particularly with accordion-style vents, which may droop and trap lint within their folds, maintaining cleanliness becomes crucial. In contrast, using a rigid metal duct would promote smoother airflow. Also confirm that the external vent flap operates correctly during operation—ensuring it fully opens—and verify that there is noticeable air movement coming through it.
If your dryer is taking an excessively long time to finish drying clothes, inspect it for a blocked ventilation system. Numerous dryers include a duct blockage indicator that alerts you when it’s necessary to clear out the vent.
Step 3: Clean the Humidity Sensor
Our top-rated dryers All include a moisture sensor that operates alongside automatic drying cycles to gauge the wetness of the clothing and turn off the appliance once the items are dry. With prolonged use, these sensors may become coated with residue, particularly if you utilize dryer sheets. This accumulation can interfere with the dryer’s ability to determine whether your laundry has finished drying, resulting in garments that are either still moist or excessively dried.
To counter this problem, clean the sensor with a cotton ball and rubbing alcohol every few months, or any time the auto-dry cycles seem to be missing the mark. The sensor is usually located just inside the dryer, underneath the door. Look for thin metal bars, about 6 inches long, with a slight curve that follows the contour of the door. If you don’t see the sensor there, check your owner’s manual for its location.
Electric Dryers Featuring a Moisture Sensor and a Duct Obstruction Detector
Here are some of the best-performing dryers from our testing that come with both a moisture sensor for improved drying effectiveness and a duct blockage indicator to warn when your exhaust vent needs cleaning.
Gas Dryers Featuring a Moisture Sensor and a Duct Obstruction Indicator
How to Keep Appliances Long-Lasting
Looking to maintain your home appliances in top condition? In the "Consumer 101" television program, Consumer Reports highlighted the crucial step for keeping these devices functioning well.
Consumer Reports is an unbiased, non-profit entity working alongside consumers to build a more equitable, secure, and healthy environment. They do not support specific products or services and refrain from accepting advertisements. Copyright © 2025, Consumer Reports, Inc.